Tuesday, May 29, 2012
Friday, July 29, 2011
Making Photo Art from Photography
This image was created using Photo Shop and two original photographs.
The first image, the one I used as the background layer, is a frosty morning photograph. After opening the background image make sure to save this as a new file so the original is not replaced.
The second image I used was a picture of a full moon in clouds. This image was dragged on top of the background image. I chose a Blending Mode of Multiply for the second image layer (the moon layer). To make the moon smaller and fit better with the background image, I used Edit > Transform > Scale, making sure to hold down the shift key and drag from the corners to constraining its proportions. I left the moon a little large for effect.
The moon was centered and too large in the original photograph. It did not cover the background image after being re-sized and repositioned. To make the sky of the moon image big enough to cover the background layer, I selected and copied parts from the edge and added them to the side then used the colon stamp to blend the seams and surrounding areas. I reduced the opacity of moon layer to 80%. I also used a large soft edged eraser to erase parts of the moon layer lighten the shading/ shadows on the snowy field and some parts of the trees. The eraser opacity was set at 20%. Then, I cropped the image to clean up the edges and frame it the way I liked.
Next, I flattened the image which became the new background layer. I duplicated that layer by dragging the background layer to the duplicate layer button in the bottom of the layer pallet. Using Filter > Blur > Gaussian Blur in the menu bar, I applied a 7% Gaussian Blur to the duplicate layer. This gave the image a painterly effect by smoothing and soften the appearance of the pixels. I reduced the opacity of the duplicate layer to 85%.
Next, I selected the background layer and applied a strong (around 200) unsharp mask filter to it. (Filter > Sharpen > Unsharpen)
Finally, I flattened the image and saved it as a new file.
The % of adjustments can and should be adjusted to what looks best for the image.
Many of these tricks I learned in my college classes but applying them this way I learned by looking through tutorials and instruction guides on the internet. Refining the technique is a matter of trial and error and practice.
All of the original pictures were photographed by me.
Sunday, March 13, 2011
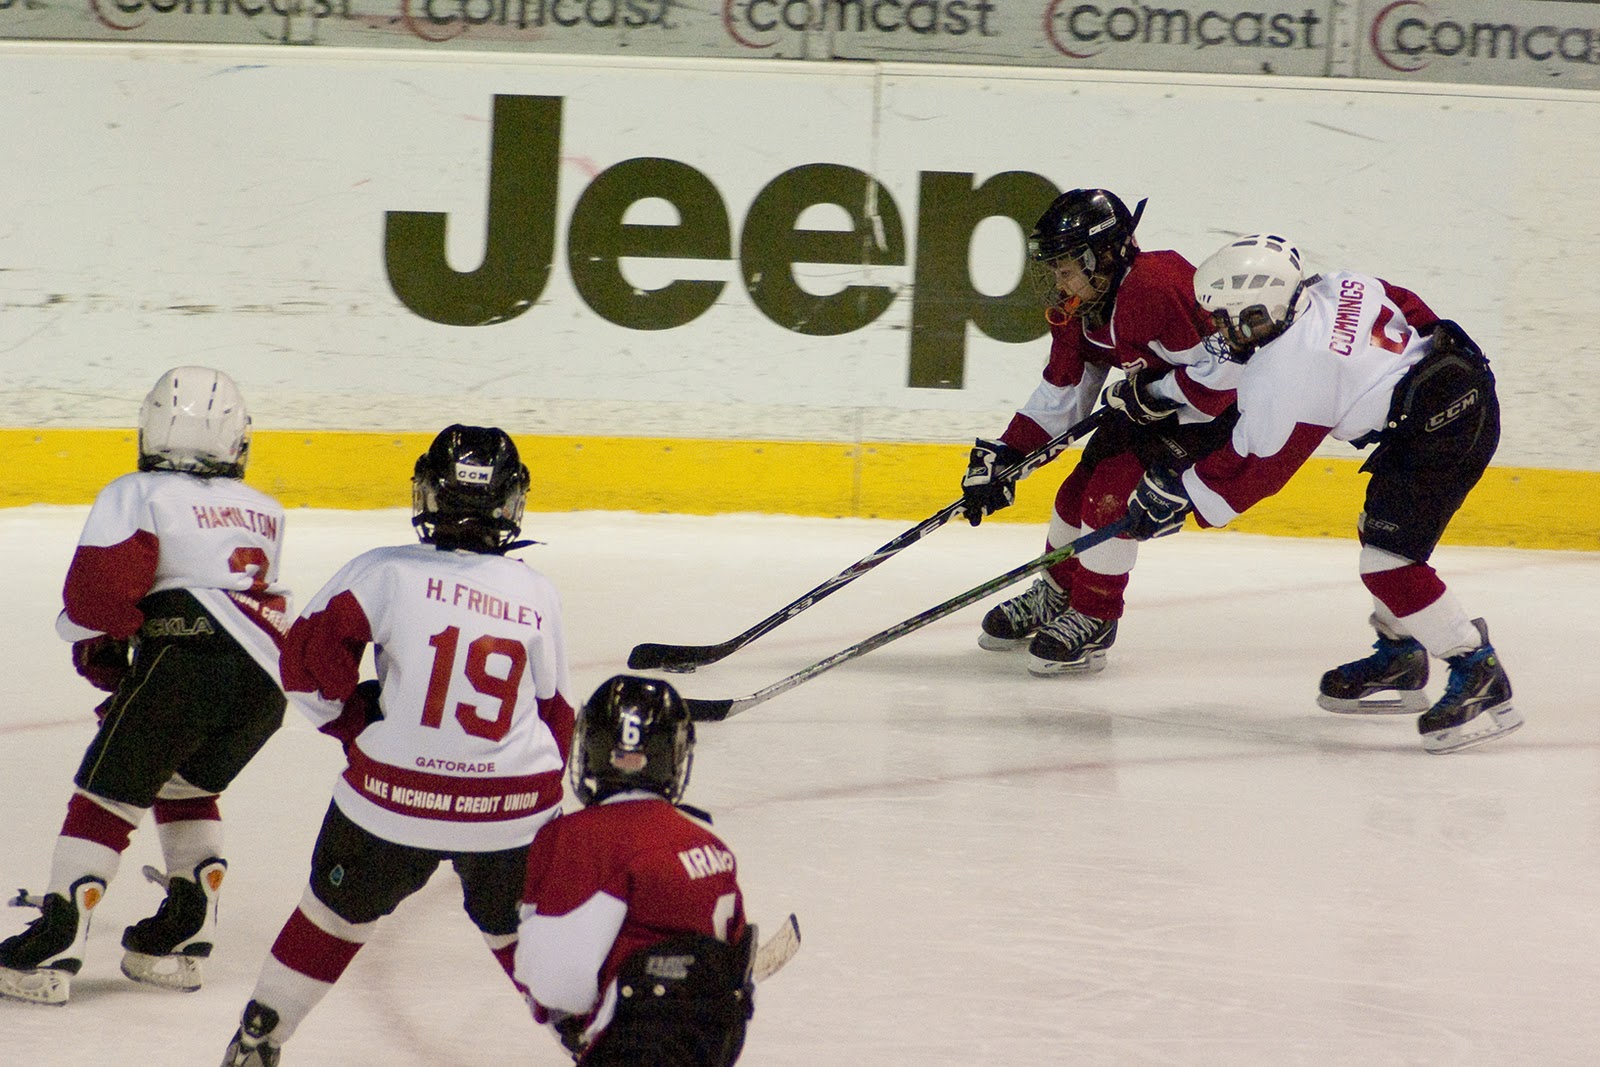
Squirt Hockey at the Van Andel Arena, Home of the Griffins, Grand Rapids, Michigan
On Saturday, March 5, 2011, I was invited to attend a youth hockey game at the Van Andel Arena, Grand Rapids, Michigan, by the Cummings family who son is a ten year old player on Team 4. This was the first hockey game I have attended, the second was later that day when I watched the Griffins play.
The youth hockey games was part of the "Growing with the Griffins", a youth hockey initiative. The game was played between GRAHA Teams squirt teams 1 and 4. As part of this special day the players and their families were given tickets to the Griffins game later that day.
What follows are some of my favorite photos from the youth game. I was not allowed to take pictures at the Griffins game because my camera and lens "looked" too professional. The following images were shot with my Pentax K10, in RAW format, with a 1600 ISO, a shutter speed ranging from 250 to 350, and f4.5-f5.6 the lowest my lens would go. Eventually I will have a camera that can do these type of images justice but for now "the best equipment to use it the equipment you have". By shooting them in RAW I was able to adjust the exposure later. It is a little more work but a great tool to have.
The challenge here was the low light conditions, distance from the subject (I used a 300 mm zoom for most of these), the speed of my subjects because they are very fast 9 and 10 year olds, and the limits of my ISO and aperture. For my first time attending and photographing a hockey game I found this it be a very fun day.
The youth hockey games was part of the "Growing with the Griffins", a youth hockey initiative. The game was played between GRAHA Teams squirt teams 1 and 4. As part of this special day the players and their families were given tickets to the Griffins game later that day.
What follows are some of my favorite photos from the youth game. I was not allowed to take pictures at the Griffins game because my camera and lens "looked" too professional. The following images were shot with my Pentax K10, in RAW format, with a 1600 ISO, a shutter speed ranging from 250 to 350, and f4.5-f5.6 the lowest my lens would go. Eventually I will have a camera that can do these type of images justice but for now "the best equipment to use it the equipment you have". By shooting them in RAW I was able to adjust the exposure later. It is a little more work but a great tool to have.
Sometimes the background gives the photograph a new meaning.
To quote my husband "Cool, he has wings."
This is one of the coaches making sure the kids stay hydrated.
Cummings, number 5, in a white helmet and with blue laces on his skates, is in each of these images. Here he is headed to the bench looking up at his family. I was a guest of his family. I have the team rosters but was unsure of publishing the rest of the children's names so they are not included.
A little air time.
They play like little pros.
The challenge here was the low light conditions, distance from the subject (I used a 300 mm zoom for most of these), the speed of my subjects because they are very fast 9 and 10 year olds, and the limits of my ISO and aperture. For my first time attending and photographing a hockey game I found this it be a very fun day.
Thursday, December 9, 2010
A Lighting Portfolio by Kathleen Krueger
The Portrait
Being a student is more about finding the answers than knowing them.
"What do you want to be when you grow up?" "What are you going to school for?" These are typical questions the student has to answer, especially for themselves. But being a student is more about finding the answers than knowing them.
From the camera’s perspective: Front right is a soft box attached to a 500 strobe at full power, rear right is a 150 strobe with a silver umbrella reflector, behind that is a 150 strobe with barn doors and a red gel, front left is a 500 strobe at half power with a gold umbrella reflector, back left is a 500 strobe at half power with snoot used as a rim light. For the pictures in the white hoody I switch places of the strobes with the soft box and the gold reflector.
Some lighting experimentation was involved. She “likes” pink in a big way which is why I added the color gel. Part of the whole identity thing. I also wanted to try to use a gel since I never had before. I can see it is a skill I need to work on. I used the silver umbrella reflector hoping to keep the “pink”, pink. I used the gold umbrella reflector trying to keep her skin tone warm.
Another Portrait
Being a parent is never easy. Parenting solo, will strengthen your character or break you.
Single Parent, Joy Kinney, with her fifteen year old son, Jason Kinney. Joy and Jason have survived some very hard trials, some failures and some successes, but everyday has its new challenges especially when Joy has to be both mom and dad to a teenage boy.
Statistics show that eighty-four percent of children of single parents live with their mothers. More than half of the single parents in the United States are raising an only child.
http://www.parenting-child-development.com/statistics-on-single-parenting.html
Location Lighting
To know Nick Cash is to know that basketball is his favorite thing.
Nick Cash loves basketball. While attending Fenton High School, in Fenton, Michigan, Nick played point guard. During his junior year he set the school record for most points scored in a season, then beat that record his senior year. His record still stands. Although offered scholarships to play at three other colleges, Nick wanted to attend Central Michigan. He hopes to have the opportunity to play for CMU in the future. An interesting side note: In the more than two hours I had Nick shooting, he never missed a shot AND he had such good control of the ball that neither he or the ball ever hit the lighting equipment.
This is the lighting set up for Nick Cash’s portrait shoot. This photograph was taken on the recreational basketball court at Northwest Apartments, Central Michigan University, Mt.Pleasant, MI. Lighting Nick’s right side is a gold reflector umbrella and a Nikon SB-900 taped to a light stand because there were no stands with flash mounts adapters. Lighting Nick’s left is an Nikon SB-800 with a hand made snoot. I love the way this is lit and the expression on his face. The one thing that is disappointing is that he dropped below the snoot’s light and does not have a successful rim light for better separation from the background.
Fashion on Location
This wood sprite, a fairy elemental who lives in the trees and the woods,
lovingly touches flowers with a little bit of magic.
Modeling this Halloween costume is Central Michigan University student, Kellea Krueger (my daughter). I chose this picture because “she looks like she could jump right out of the picture”. I don’t like the excessive rim light on her arm but I didn’t catch it at the time and wasn’t able to recreate the image when we reshot and although I tried burning it, it really needs a little more help from photoshop to fix it than that. This I will do but not for journalism class.
The lighting for this picture uses some ambient light and 3 flashes. The one in front to her right has a diffuser on it. Behind her is a backlight/ background flash with a foam board acting as a gobo to keep the light off my lens. To her left is an additional light where a tree is acting as a gobo.
Painting with Light
Fallen Angel
This photograph was created using the bulb setting on my camera. A pebble was taped to the release button for the duration of the exposure. A flash with an amber filter was used to light her from behind one behind her head and once for her legs and feet. The falling halo and the fiery wings are done with small flashlights with amber gels over them. A strobe without a gel was used to light her in front from above and to the side. The image was converted to black and white using photoshop adjustments. The model is Central Michigan University student Amanda Cudney.
A Still Life
I Sea You
A little bit of sea inspired character . The Lighting for this is two 150w strobes in soft boxes behind a white curtain directly behind the subject. There is a fill light to the front left with a diffuser on it. There is an additional strobe lighting the wall behind the sheet at very low power. Its purpose is to trigger the strobes behind the curtain because the use a slave trigger they may not see the fill flash in front of the curtain. The flashes are triggered by pocket wizards synced to my camera.
A Photo Illustration
Falling out of Love
Fifty percent of marriages end in Divorce. Thirty five percent of people having experence a serious break up in the last 10 years. Yahoo Personals polling showed that fifty percent of individuals reassess their relationships between Christmas and Valentines Day. They term this the “Breakup Season”.
This photo was created in a series of steps. The first step was to photograph the young man in a motion of falling. There was a softboxed strobe to each side of him and a flash strobe shooting through an umbrella under each of these to get enough light on his legs. Behind the curtain behind him is another strobe light creating a rim around him. Second step make a “breakable heart”. This was made from frozen Ice in aluminum foil shaped like a heart and melting the edges with hot water to smooth it out. Next, photograph the heart, and the Photograph the heart as it hits and breaks. The lighting for this is a much closer version of the light use for the young man with the power down a little. Finally, Assemble in Photoshop. The bottom layer is the unbroken heart with a copy of that layer above it with a color burn applied. The third layer is the broken heart with a pin light applied. The next two layers above that are the same image of the falling young man with different amounts of drop shadow effects. To top off the layers I used a curve to adjust the lighting and contrast.
Another Photo Illustration
Who do you listen too?Call it concience. Call it the voice of good and evil.
No matter what you call it the decision isn’t always easy.
This Photo illustration was a combination of several techniques. There is an element of painting with light to create the angel’s halo and wings. The three images were photographed separately in a totally dark room using the bulb and a pebble to create long exposures. The subject was strobed from behind and to one side on each image except the angel the wings and halo are her backlight. The entire image was combined in photoshop using a lighten mode above a normal mode copy of each of the smaller images then portions of the edges around the subject were remove from both layers with an eraser with a soft feather and a reduced opacity.
Subscribe to:
Posts (Atom)